Showing posts with label recipes. Show all posts

Wednesday, October 29, 2014

Crockpot meatballs with fall veggies.


I don't know about you, but I love fall veggies. Almost as much as I love cold weather and hoodies. And ragweed dying.

The veggies in the fall are tasty as well as nutritious.  They are packed with vitamins, and come in a variety of vibrant colors.  I feel like every year I discover a veggie I never heard of before, and I fall in love all over again. Last year I found watermelon radishes which are amazing. This year.... Purple sweet potatoes stole my heart.  I love purple carrots, so I figured, why not? I wasn't wrong :)

Today I decided to make meatballs and sauce, but to put a fall spin on them.  I have some purple carrots from my South Shore Organics delivery, as well as purple sweet potatoes that I bought in their store (if you don't get delivery from them you need to stop reading and set it up, if you're in this area. You will not be disappointed!!). I also had pumpkins that I roasted and pureed.  So exciting!


First, I cut up the raw veggies and put them in the food processor with the egg and pureed pumpkin.


Then added this to the grains and rolled into balls.


After they came out, I knew I was onto something :)


Then I put them in my homemade sauce that was in the crockpot already. I put a fall spin on that too with the extra pumpkin I had left.


I can't wait until dinner time tonight.  I plan to serve this over spaghetti squash for Daddy, D and me. Anth might want them without sauce and with sweet potatoes on the side. So I put some aside for him. We'll see how that goes!


Meatballs:

1 lb ground bison/buffalo/venison/extra lean beef
1 lb ground turkey
1 cup whole oats
1/2 cup cooked quinoa
1/4 cup cooked brown rice
1 medium purple sweet potato
1 large purple carrot
1/2 cup pureed roasted pumpkin
2 cloves garlic
1 farm fresh egg
1 tablespoon dried basil
1 tablespoon dried thyme
1/2 tsp sea salt


Preheat oven to 400.
Combine meats and grains in a metal bowl. Set aside
Place veggies and egg in food processor. Process until finely ground and combined.
Add to meat mixture.
Combine by hand (with gloves if desired) until fully combined.
Roll into small balls and place on broiler drip pan.
Cook for 15 minutes or until cooked through.
Add to sauce in crockpot. (See below)


Sauce:

1 small can tomato paste
1 cup pureed pumpkin
1 cup water
2 large cans crushed or kitchen ready tomatoes
2 large cloves garlic
Salt, pepper and basil to taste

Combine paste, pumpkin and water in crockpot and wisk together.
Add crushed tomatoes and spices.
Cook on high for 1 hour prior to adding meatballs.
Once meatballs are added, turn to low for 4 hours.

Serve over pasta or spaghetti squash.


Sunday, October 19, 2014

Easy chocolate chip cookies.

I wanted cookies tonight. I wasn't going to stop til I got them. But I have a headache and I'm exhausted. Being a full time student, full time nurse and mom will do it to you. I was out of baking soda. This was very much a tragedy. Til I realized that pancake mix has leavening in it and I started thinking.

I had recently made cinnamon rolls with my favorite pancake mix, as well as pumpkin bread. This was gonna be awesome!!!

I threw this together based on my chocolate chip cookie recipe, without the egg substitute and gluten free flour, and of course since those are double chocolate cookies, I made other adjustments. Also, I adjusted for what was already added to the pancake mix, and created a recipe.  I decided since I had just made apple butter recently, that I could eliminate an egg and add that.  It usually makes things so moist.

Holy canoli, I wasn't wrong!!

It surprised me that the first time I made them, they were awesome, and I don't want to change anything about it.


Ingredients
1 cup packed brown sugar
1/2 cup palm oil shortening
2 tsp bourbon vanilla
1 egg
2 tbs apple butter
2 cups Immaculate Baking Co. Organic Pancake & Waffle Mix
1 cup whole rolled oats
1 cup Enjoy Life chocolate chunks


Cream brown sugar and palm oil. Add egg, vanilla and apple butter. Continue to blend with hand held or standing mixer. Add pancake mix and oats. Blend on low til well combined, scraping sides of bowl as needed. Fold in chocolate chunks.


Bake on ungreased cookie sheet for 8-10 minutes or until golden brown on edges.


Sunday, August 24, 2014

Enjoy Life adventures.


I woke up a few days ago to a box of Enjoy Life cookies at my door. All pretty in their new packaging. Along with a link to their new recipes page.


Needless to say, we were excited.
We decided we'd make the frozen s'more cookie sandwiches from the site the next day.
As soon as I got home from work, Anth put on his apron and got ready to work.


 He began by spreading out the cookies for me. He was very excited to count out 12 on his own.


Anth added the chocolate chips to the ice cream, and I started spreading the coconut ice cream on the cookies to make sandwiches. We put them on a cookie sheet to freeze and even made 2 sandwiches with the double chocolate cookies (Anth's favorite kind).
Anth ate the rest of the ice cream


Then we waited over night while they froze.


The next day we used a double boiler to melt chocolate chips and palm oil, then dipped half of each sandwich in. They had to freeze for one more hour to set.


Time to enjoy!!

For those of you who don't know Enjoy Life, they are a company who makes foods that are free of the 8 most common allergens. They make these foods for people like Anth and others with multiple food allergies, so they can enjoy eating the foods you and I take for granted. Their foods are all free of peanuts, tree nuts, eggs, gluten, dairy, soy, fish and shellfish.

This dessert, as I made it, is also free of those 8 allergens.


****Of note, the cookies pictured above come in flavors such as double chocolate, chocolate chip, honey graham and sugar crisp. The only one of them that is certified vegan is the sugar crisp. The others are not because of the sugar they contain.


The recipe from the Enjoy Life website is linked above. Mine is below, with a few changes that I made, based on our dietary needs.


S'more Ice Cream Sandwiches
(makes 6 sandwiches)

Sandwich Ingredients
1 pint vanilla bean So Delicious Coconut Milk ice cream, softened
4 T Enjoy Life Semi-Sweet Chocolate Mini Chips
12 Enjoy Life Vanilla Honey Graham Crunchy Cookies

Chocolate Coating Ingredients
¼ C Enjoy Life Semi-Sweet Chocolate Mini Chips
2 t Spectrum Sustainable Palm Oil Shortening


Directions:
1. Mix the Enjoy Life Semi-Sweet Chocolate Mini Chips in with the softened coconut milk ice cream.
2. Scoop about ¼ C onto 6 of the Enjoy Life Vanilla Honey Graham Crunchy Cookies.
3. Top with another cookie.
4. Place on a parchment lined cookie sheet and place in the freezer overnight.


The following day:
1. Melt the ¼ C Enjoy Life Semi-Sweet Chocolate Mini Chips with the 2 t palm oil.
2. Remove the cookie sandwiches from the freezer and dip about half into the chocolate.
3. Place on parchment lined baking sheet in freezer
4. Freeze until relatively firm, about another hour or so, and then cover until ready to eat.
 

Saturday, July 12, 2014

Best.ever.blondies.

I have been on a kick lately. A kick where I eat clean and exercise regularly. But I love dessert.  A lot. I needed something sweet today and I decided to combine a few recipes I have seen lately for blondies. And to make them healthier.

They were deeeeelicious.

Here goes:

1/2 cup coconut oil
1/2 cup unsweetened apple sauce
1 1/2 cups coconut palm sugar
2 tsp ground chia seeds
2 tbs warm water
2 tsp vanilla extract
1 cup quinoa flour
1/2 cup oat bran
2 tsp baking powder
1 cup unsweetened coconut flakes (with an additional 1/4 cup for topping)
1 cup dark chocolate chips (at least 60% cacao)

Preheat oven to 350. Mix oil, apple sauce and sugar in large bowl with an electric mixer. Combine chia and water until a gel forms and add to sugar mixture, along with vanilla. In a separate bowl, combine quinoa flour, oat bran and baking powder. Add to sugar mixture and mix on low until combined. Fold in chocolate and coconut.
Pour into 13x9 in pan and sprinkle with extra coconut. Bake for 25-30 minutes or until edges slightly brown and begin to pull away from the sides of the pan. Allow to cool completely and slice into 16 bars. 

Tell me they're not great. Oh.em.gee.

You're welcome.

*Sorry there are no pictures.... they were gone too soon.

Saturday, September 14, 2013

The best season of the year. Pumpkin season.... wait, fall, yeah, fall!!!


Pumpkin season has now officially begun, and we are in the throes of apple season.  This couldn't be a better season, as far as I'm concerned!

I visited the Farmer's Market this morning, and was very disappointed that one of the ladies working at the booth selling pumpkins didn't know how to roast a pumpkin. Or toast the seeds. Or make a pumpkin pie without the cans. The cans are great. They are easy, tasty and available all the time. But... they are $1 to $3 depending on where you go, when you can roast and puree a fresh pumpkin for $.59 a pound (and I paid $1.18 for my pumpkin today, and I got the equivalent of about 5 cans of pumpkin. It's a no brainer to me..... And it's healthier, less processed, tastier, you also get the seeds (which are high in zinc) and roasting pumpkins make your house smell so gooooood!


Here's how:


Cut a pumpkin in half (sugar pumpkin, not the ones used to decorate)
Take the seeds out (set them aside. I will tell you what to do with them). Put pulp side down in a greased roasting pan, cover with tin foil.
Cook on 400 for 30-40 minutes, depending on the size.
It is ready when you can stick a fork easily through the skin.
Once it cools, you can scrape the pulp out of the skin, place it in the food processor, and there you have it......


The seeds: 

Once you get them all out, you're gonna need to clean them off. So, put them in a strainer, get all the orange pumpkin strings out, and rinse them completely.

Fill a pot with water and salt at a ratio of 1 cup seeds to 3 cups water, 1 T salt.
Bring to a boil, add the seeds and simmer for 10 minutes or so.
Drain, do not rinse, and allow to dry off for a few.
Spread them out on an olive oil greased roasting pan, or lipped cookie sheet.

Cook at 400 for 10-20 minutes, or until golden brown.
Cool completely before eating or covering.
(I leave the shells on the seeds because they help to maintain the level of zinc in the seeds. Plus, it's so hard to get the seeds out without making a huge mess, so, I just don't bother. Also, don't brown for more than 20 minutes, that is considered the threshold for maintaining the maximum amount of minerals in the seed.) 


Now for the fun stuff!  What do you make with all this pumpkin?!? 

1. Mix a tablespoon of pumpkin into your oatmeal in the morning.

2. Add a cup of pureed pumpkin to tomato sauce in place of tomato paste.
3. Use as a substitute for eggs in most baked goods. Use 1 tablespoon pumpkin for each egg.
4. Add to meatballs or meatloaf
5. Stir into your favorite macaroni and "cheese" recipe

And tons of baked goods!!!!


For example: Breakfast cookies or Vegan Brownies

Here are a few:


Apple pie pancakes (the healthy way)


2 cups flour (I use Trader Joe's all purpose, but any kind is fine. GF even)
1 T cornstarch (optional, but makes pancakes less dense)
1 T brown sugar
1 T baking powder
1 T olive oil (coconut would be good too, melted)
1 t salt
3 T pureed pumpkin
1 1/4 cups coconut milk (if using canned, 1/2 cup coconut milk: 3/4 cup water)
2 t cinnamon
(if using GF flour, use 1/2 t xanthan gum)
2 apples, cored, not peeled, diced

Wisk together everything but apples. Fold in apples. 
Cook on medium heat on a griddle, or frying pan on high, sprayed with coconut or olive oil (coconut tastes better).
Once sides bubble flip (after about 2 minutes), cook for 3 more minutes, or until cooked through. 
Serve with dairy free butter, or coconut oil and Grade B maple syrup 


Crockpot Pumpkin Butter
Meat of 2 Sugar/Pie Pumpkins
2 apples, cored, diced 
1/2 cup Water

1/2 Cup Brown Sugar (I used light brown)

1 T cinnamon
1/2 t ground ginger
1/2 t ground nutmeg
1/4 t ground cloves(you can also use pumpkin pie spice, and add extra 1/2 tsp cinnamon)

Peel and chop the pumpkin, removing the seeds (set aside for later). 

In a large bowl, or using the Crockpot itself, toss the pumpkin, apple, sugar and spice.
Once combined, pour water over the top. 
Set to medium or low for 8 hours. When soft enough, transfer to a blender or food processor and puree. Return to Crockpot.
Cook on high, uncovered, til no liquid remains. This typically takes me 4 hours or so, but keep an eye on it, so that it doesn't burn.
Allow to cool completely, and if you would like a smoother texture, blend a second time. I transfer mine to canning jars and refrigerate, but it can be canned as well. I've kept mine in the fridge up to 2 months without an issue. 

Pumpkin Apple Pie Bars


Crust Ingredients:
1 1/3 cup unbleached white flour
1/2 cup brown sugar
8 tablespoons palm oil shortening, coconut oil or dairy free stick butter

Filling Ingredients:
1 cup coconut cream (cold, water removed. See below)
3/4 cup sugar
3/4 cup pumpkin puree
1 T coconut flour
2 eggs, slightly beaten
1 1/2 T cinnamon
1 t pumpkin pie spice
1 t vanilla 
1 1/2 cup diced apple (including skin)

Topping extras
2/3 cup crust mix
1/2 cup brown sugar
Cinnamon and sugar to taste

Mix crust ingredients in a food processor til crumbly. Set aside 2/3 cup for topping. Press into the bottom of 2 8x8 pans (if using a 9x13 pan, cooking time will be longer, and the results are really better in smaller pans). Bake at 350 for 15 minutes, and allow to cool.

Mix filling ingredients, except apple, with an electric mixer. Fold in apple. Pour into cooked and cooled crust mix. For topping, add the remaining crust mix to the brown sugar. Sprinkle on top. Sprinkle top with cinnamon and sugar. Bake for 30-40 minutes, or until set.

Allow to cool before cutting, and once cut, refrigerate to allow them to set completely.


There will be more. I promise. Just wanted to give you a good start!


Tuesday, September 10, 2013

Apple Crisp, redone. Nut and dairy free :)

If you're like me, you never know what to do with all these apples once fall comes. Even if you've been excited for them alll  summer!
I came up with a quick easy apple crisp, that's both nut and dairy free. Did I mention easy. Oh its easy!

Filling:
3 medium to large tart apples, peeled, cored and chopped into 1/2 inch chunks.
1 tablespoon raw sugar
2 tsp cinnamon
1 tablespoon melted coconut oil

Crumble:
3 packets apple cinnamon instant oatmeal (check to be sure the brand you choose is safe for your family.)
1/2 cup brown sugar
1/4 cup palm oil shortening, room temperature
1 tablespoon coconut flour

1. Preheat oven to 400. Combine filling ingredients. Toss to coat. Pour into 8x8 glass pan, greased lightly
2. Use the same bowl and mix oatmeal, brown sugar, coconut flour til combined
3. Add shortening and mix with a fork til it looks like beach sand. Pour over apples. Bake for 20 minutes, uncovered or until the sides bubble.

So good!


P.S. sorry about the photo quality. My flash wouldn't work! So sad!

Sunday, July 7, 2013

Impromptu breakfast cookies.

I woke up this morning inspired to feed my kids something different for breakfast.... I had half a pureed pumpkin, some raw local honey I was itching to use, some farm fresh eggs and some homemade peanut butter. I decided I was going to make "cookies" to guarantee they'd eat them. To be honest, with my kids, it's all in the presentation. I won this time :)

I used about half the pumpkin, some hemp protein, a couple pieces vegan almond dark chocolate (80% cacao) chopped in the food processor and shaved coconut. I also didn't want to use traditional flour so I opted for a tablespoon or so of coconut flour to hold it all together and about a handful of gluten free oats. I added a bit of baking powder, only because I had no baking soda. I wasn't making this gluten free on purpose, it just turned out that way :)

I am actually in disbelief. They came out amazingly, and I just made it up as I went along. And, Anth and Delina each ate 4 of them with a pile of fresh local raspberries!! 

(Best part: There was a ton of pumpkin in them and my kids didn't even know. Hidden veggie score!)


Here's the recipe

  1. 1/2 cup raw peanut butter (or sunbutter)
  2. 3/4 cup pureed roasted pumpkin
  3. 1/3 cup raw honey
  4. 1 tsp baking powder
  5. 2 fresh eggs
  6. 2 tbs coconut flour
  7. 1/2 cup hemp protein powder (I used this one)
  8. 1 tbs ground cinnamon
  9. 2 oz your favorite dark chocolate (chopped finely--in the food processor works best for me)
  10. 1 cup gluten free oats
  11. 1 cup unsweetened shaved coconut

Preheat the oven to 350. Grease 2 cookie sheets (I use coconut oil). Combine all but last 3 ingredients and mix with electric mixer. Once combined, fold in last 3. Place on cookie sheets by the tablespoon. Bake for 12-15 minutes. Will still be soft when they are finished. For a crunchier cookie, Bake for another 2 minutes. 
Makes 2 dozen.

Enjoy.

Sunday, September 4, 2011

Blueberry Breakfast Cake. My way!

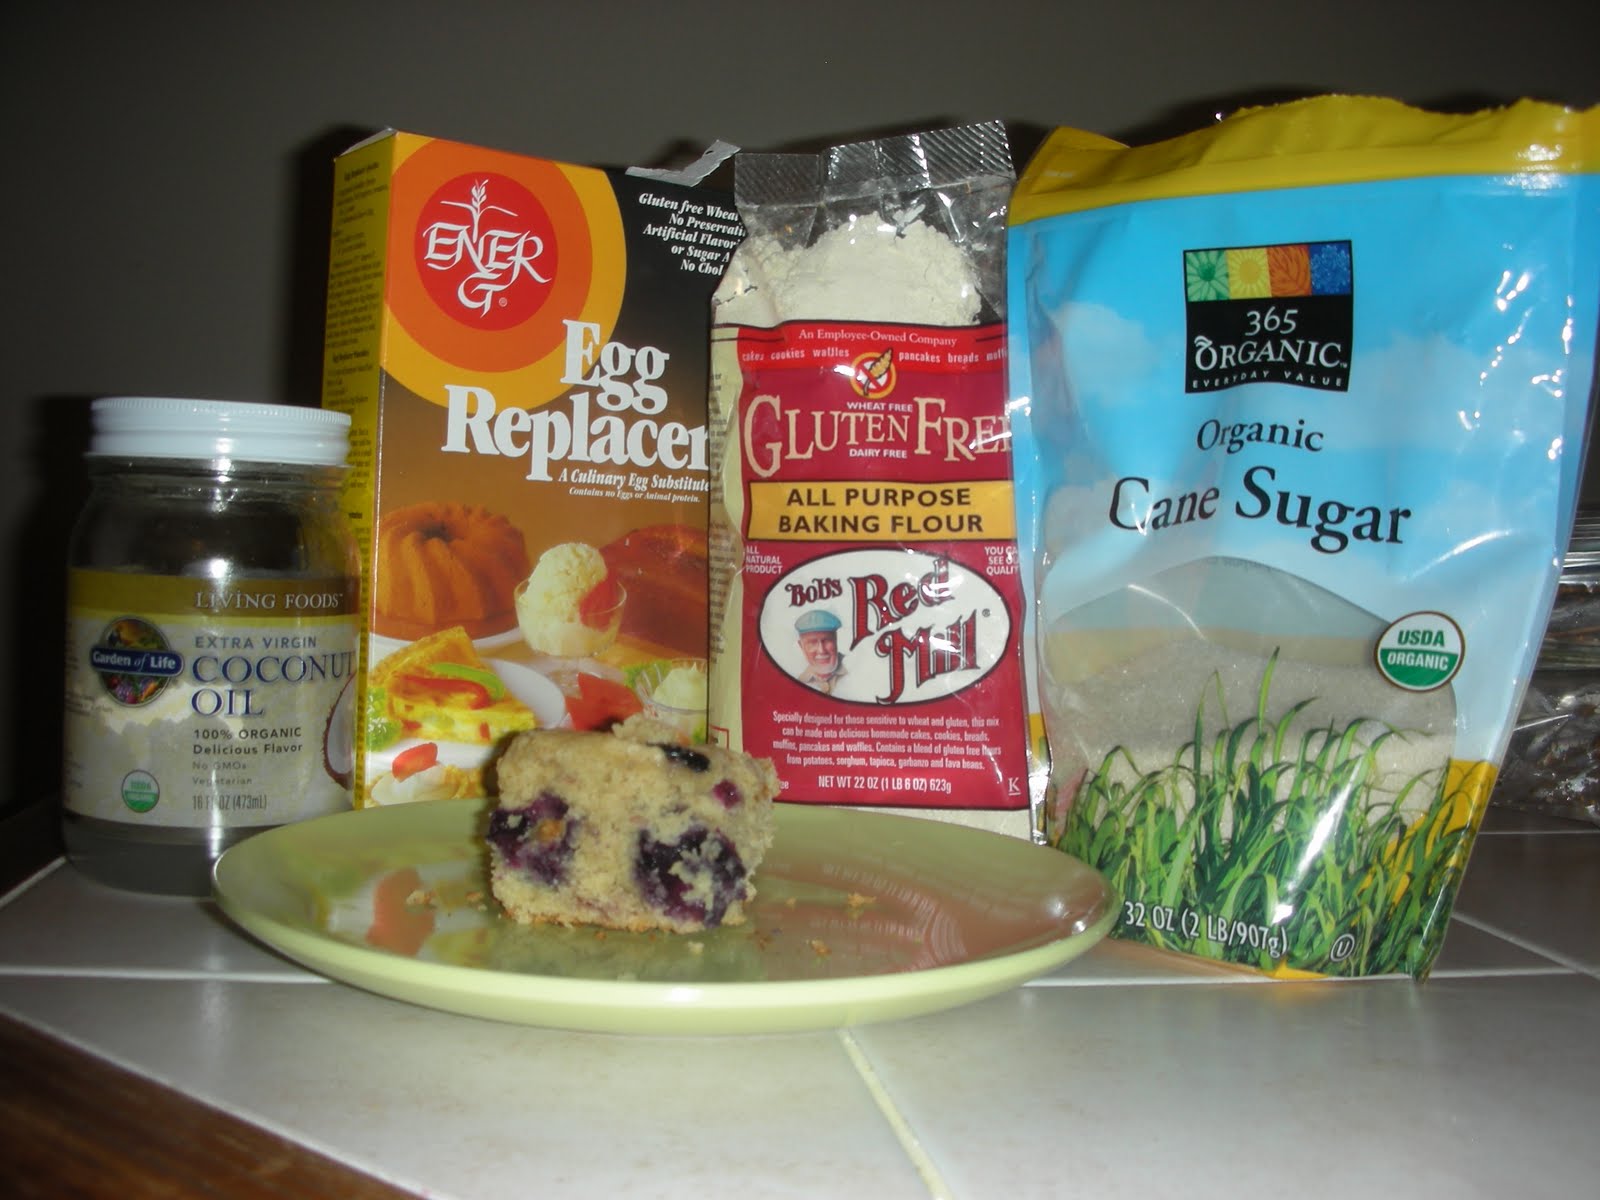
I found this AMAZING recipe on Pinterest the other day for Buttermilk Blueberry Breakfast Cake I was sooo sad that I couldn't eat it.  You know, cause of Anthony's allergies and all... And I realized that I could if I tried hard enough, edit the recipe so I could eat it.  I went into it knowing that I may have to make a few attempts to make it perfect and edible, but I thought it was worth a shot.

But...

I GOT IT RIGHT THE FIRST TIME!!!!!


Here's the recipe:

1/2 cup unsalted butter room temperature unrefined coconut oil
2 tsp. lemon zest or more — zest from 1 large lemon lemon juice
7/8 cup + 1 T. sugar
1 egg, room temperature egg worth of egg replacer (follow instructions on the box)
1 tsp. vanilla2 cups flour Bob's Red Mill Gluten Free All Purpose Baking Flour
2 tsp. baking powder
1 tsp. kosher salt
1/2 tsp. xanthan gum
2 cups fresh blueberries 1 cup fresh strawberries chopped and 1 cup fresh blueberries
½ cup buttermilk Silk Vanilla Almond Milk

I followed the directions from the original recipe, substituting my ingredients for the ones in the directions.  And also made the following changes:

1. Preheat the oven to 350ºF. Cream butter coconut oil with lemon zest juice and 7/8 cup of the sugar until light and fluffy.
2. Add the egg egg substitute mixture vanilla and beat until combined. Meanwhile, toss the blueberries blueberries and strawberries with ¼ cup of flour gluten free flour, then whisk together the remaining flour gluten free flour, baking powder, xanthan gum and salt.
3. Add the flour gluten free flour mixture to the batter a little at a time, alternating with the buttermilk almond milk. Fold in the blueberries blueberries and strawberries.
4. Grease a 9-inch square baking pan (or something similar) with butter canola oil or coat with non-stick spray. Spread batter into pan. Sprinkle batter with remaining tablespoon of sugar. Bake for 35 45 minutes.
Check with a toothpick for doneness. If necessary, return pan to oven for a couple of more minutes. Let cool at least 10 minutes before serving.


I was able to put about 8 servings that were Anthony's size in the freezer in individual bags.  I will let you know how they are out of the freezer.


******Just a disclaimer.  I REALLY wish I could eat the recipe I found on Pinterest.  Like, more than you can imagine.  Blueberries and buttermilk are 2 of the most amazing things the world has to offer.  I love 'em.  I also LOVE lemon zest, but considering I wanted to feed this to Anthony, I wasn't entirely sure how he'd do with that... So I changed it to lemon juice.  I took the vanilla out because there is vanilla in the almond milk.  I added xanthan gum only because I had to make it gluten free, therefore had to add it to hold it together.  I only added strawberries because Anthony loves them, and I had a BUNCH of them that wouldn't be good much longer in my fridge, so I decided to try them in it.  I used this recipe as a guide for the blueberry cake I've been wanting to try to make, and it came out sooooo good!!!!  Thanks to  Alexandra for giving me the tools I needed to make it happen!!

Monday, July 18, 2011

Soap... The easy and all natural way....

First of all, let me say, it's been a week since I promised to post this recipe for soap, but I'm a busy Mommy... and frankly, there wasn't enough time. 
And just to let you know, I really wanted to make the soap completely from scratch, but because of a bunch of meth heads who use potassium hydroxide, or lye, to make drugs, it is illegal to buy it in the solid form unless you are a known "soap maker."  Whatever that means!  So we used solid castile soap and ground it down with a cheese grater and added what we wanted to it.  Also, I have 2 kids in the house under 5.  Using lye can be dangerous in its raw form.  (when you use lye in soap making, all of it is cooked off when saponifying oils into soap and glycerin... according to Dr. Bronner)
This is how we made all natural castile soap, as close to from scratch as we could:

1 bar Dr. Bronner's Baby Mild Castile Bar Soap
2 tablespoons coconut oil
1/8 cup calendula water (directions to make this are below)
3 drops lavender oil
4 drops tea tree oil

Grate down the bar soap, or process in the food processor.  Add grated soap, and coconut oil and calendula water to a double boiler, with about a cup of water in the bottom pan, so you don't scorch the soap.  Heat on medium until all soap melts and a liquid is achieved.  Add essential oils of your choice. 


Essential Oils can be found here. Feel free to look at uses of them and choose a combination that suits your needs.  The soap we made is good for eczema and dry skin, also has a calming scent.  If you are not using calendula (for eczema) you can just use an 1/8 cup distilled water.


Calendula water:

1 cup dried calendula flowers (from a health food store)
1 cup water

Boil water.  Add calendula flowers and remove from heat.  Allow to steep for 1 hour or more for a stronger "tea."  Allow to cool before adding to soap.  Use whatever is left over for an eczema mist.  Put it in a spray bottle and mist on affected area to soothe it. 

Happy soap making!!

Monday, June 13, 2011

Ginger Carrot Soup, the way I like it :)

So, since having my son, I have become much more cognizant of what I put in my body because, well frankly, I'm not gonna put just anything in his.  So, I've been doing more shopping at farmer's markets, health food stores, such as Good Health Natural Foods, and Whole Foods Market.  I recently took a friend to Good Health to see how awesome their selection is, and we happened upon ginger carrot soup, and I remembered making it a long time ago, but set out to perfect my recipe.  I am done, and here it is:

Ginger Carrot Soup (of course, gluten-free, soy-free, dairy-free)

4 tablespoons olive oil
1 diced onion
3 tablespoons minced garlic (or 4 cloves, crushed)
2 pounds peeled chopped organic carrots
5 generous tablespoons minced fresh organic ginger root.
4 cups vegetable stock
*I make my own with 36 ounces water, an onion, 2 carrots, 2 celery stalks, 3 or 4 tablespoons tomato paste and salt and pepper and I let it cook in the crock pot for 10 hours or so, and then strain out the veggies but store bought is ok too*
2 cups Silk Pure Almondmilk, unsweetened

Heat oil in a skillet and add onion and garlic.  Saute til both are cooked but not burned.  Add carrots and saute only til they are coated with the oil, then transfer all of this, plus the ginger to a soup pot along with the vegetable stock.  Bring to a boil, then immediately turn down to the minimum setting.  Leave to simmer until carrots are tender, about an hour.  Allow to cool for about 30 minutes.  Place in a food processor on the puree setting in stages until all of the soup is pureed.  Return to soup pot and add almondmilk.  Simmer for another 15 minutes, and serve hot. 

*I ate it all too fast to take a picture... Next time I eat it, I'll be sure to get out the camera before I get out my spoon :)
Enjoy!!

The best cupcakes I can eat...

Ok.... So Delina wanted to make cupcakes yesterday.  This is my take on the recipes I searched through yesterday, and guess what?!  First time ever making gluten free cupcakes was a huge success.  They were DELICIOUS.  I even let her pick out some food dye free sprinkles, because food dyes drive me insane!!!  Here is what we did!!  Enjoy!!


Gluten-free, soy-free, dairy-free Vanilla Cupcakes
2 tablespoons canola oil
1 cup sugar
2 large eggs
1 1/4 cup Bob's Red Mill gluten free all purpose baking flour
1/4 tsp non iodized sea salt
1 1/2 tsp baking powder
1/2 tsp xanthan gum
1/2 cup  canola oil
1/2 cup Silk Pure Almondmilk, unsweetened
1 tsp pure vanilla extract


Preheat oven to 350. Position rack in centre of oven. Grease cupcake pan with canola oil and set aside. Add sugar and eggs to large bowl mix thoroughly, until fluffy. Add flour, salt, baking powder, xanthan gum, oil, milk and vanilla. Mix for 2 minutes. Pour batter into prepared pan. Place in centre of oven and bake for about 20 minutes or until centre springs back when touched and cupcakes are very lightly browned (bake about 35 minutes for nine-inch round, 40 minutes for eight-inch round). Cool on rack for five minutes. Remove cupcakes from pan onto rack and cool completely before icing.

Gluten-free, soy-free, dairy-free frosting

2 tablespoons water
1/2 tsp pure vanilla extract.

Combine all ingredients and mix well. 

Top with India Tree Sparkling Sugar.  Because I HATE FOOD DYES :)

Thursday, June 9, 2011

Secrets I've learned. Usually from mistakes I've made.

My kiddos
I've decided that from now on I'm going to include posts containing recipes I've either learned or made up, things that work in our house and things that don't. I have an extremely picky 5 year old step daughter who adamantly refuses to eat vegetables, and a very agreeable 5 month old who doesn't give me much trouble, so some the things I do definitely will only work for some babies, but I'm telling you, if it works in my house when it comes to preschool aged children, then most likely, it'll work for anyone. The other thing I should mention is that Anthony is allergic to wheat, soy and milk we found out recently.  So, most of the things I make are free of gluten, soy and dairy.  If something contains something from this list, I will note that it is not free of allergens.
Homemade chicken nuggets

First, I have a habit of hiding veggies in anything Delina will eat.  Zucchini and squash in chicken nuggets, carrots and sweet potatoes in mac and cheese, broccoli and spinach in meatballs and hamburgers and my favorite, any veggie I have in the house goes in my tomato sauce when we make homemade pizza.  My food processor is my best friend.  I'm not kidding.  All these veggies can easily be hidden if they are pureed, and if you do it right, they won't even taste a difference. 
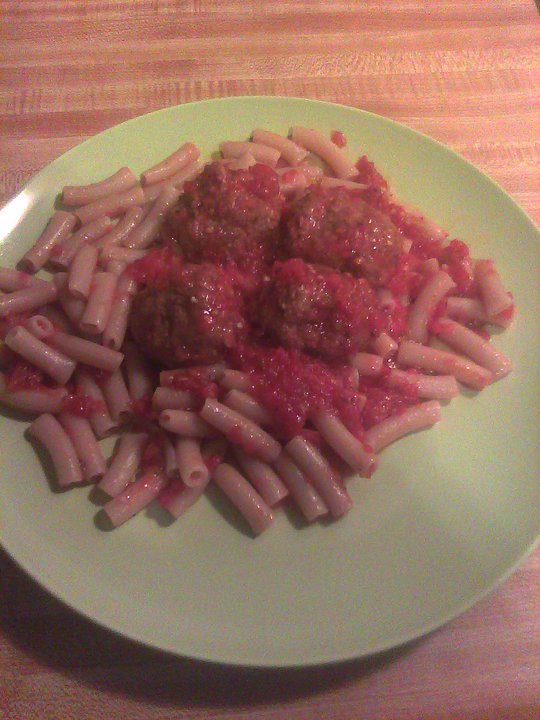
Homemade Meatballs
With Gluten free Pasta

I also make all my own baby food.  This is another reason I love my food processor.  I will share secrets about this as well.

Last... cleaning supplies.  I make them myself, or use green, if I can't make a better one myself.  I will give you my thoughs on this... I also will definitely let you know when I find an awesome product you should know about!!!